

Classifying open-ended verbatim transcripts (levels 1 and 2) with smartinterview
Once the data has been collected, whether via SmartInterview or an external file, the next step is to transform the open-ended responses into usable thematic codes. Smartinterview allows you to:- Define a coding plan (1 or 2 levels of depth) (3 coming soon)
- Automatically generate themes using AI, with customized instructions
- Precisely control the number of codes per respondent using a rules system
- Import a training set to guide classification
- Pre-classify a sample and correct the results
- Run the full classification on all responses
- Evaluate code quality with a MECE (mutually exclusive, commonly exhaustive) correlation matrix
- Export results to Excel
- Analyze results on the dashboard
1. Choose the data source
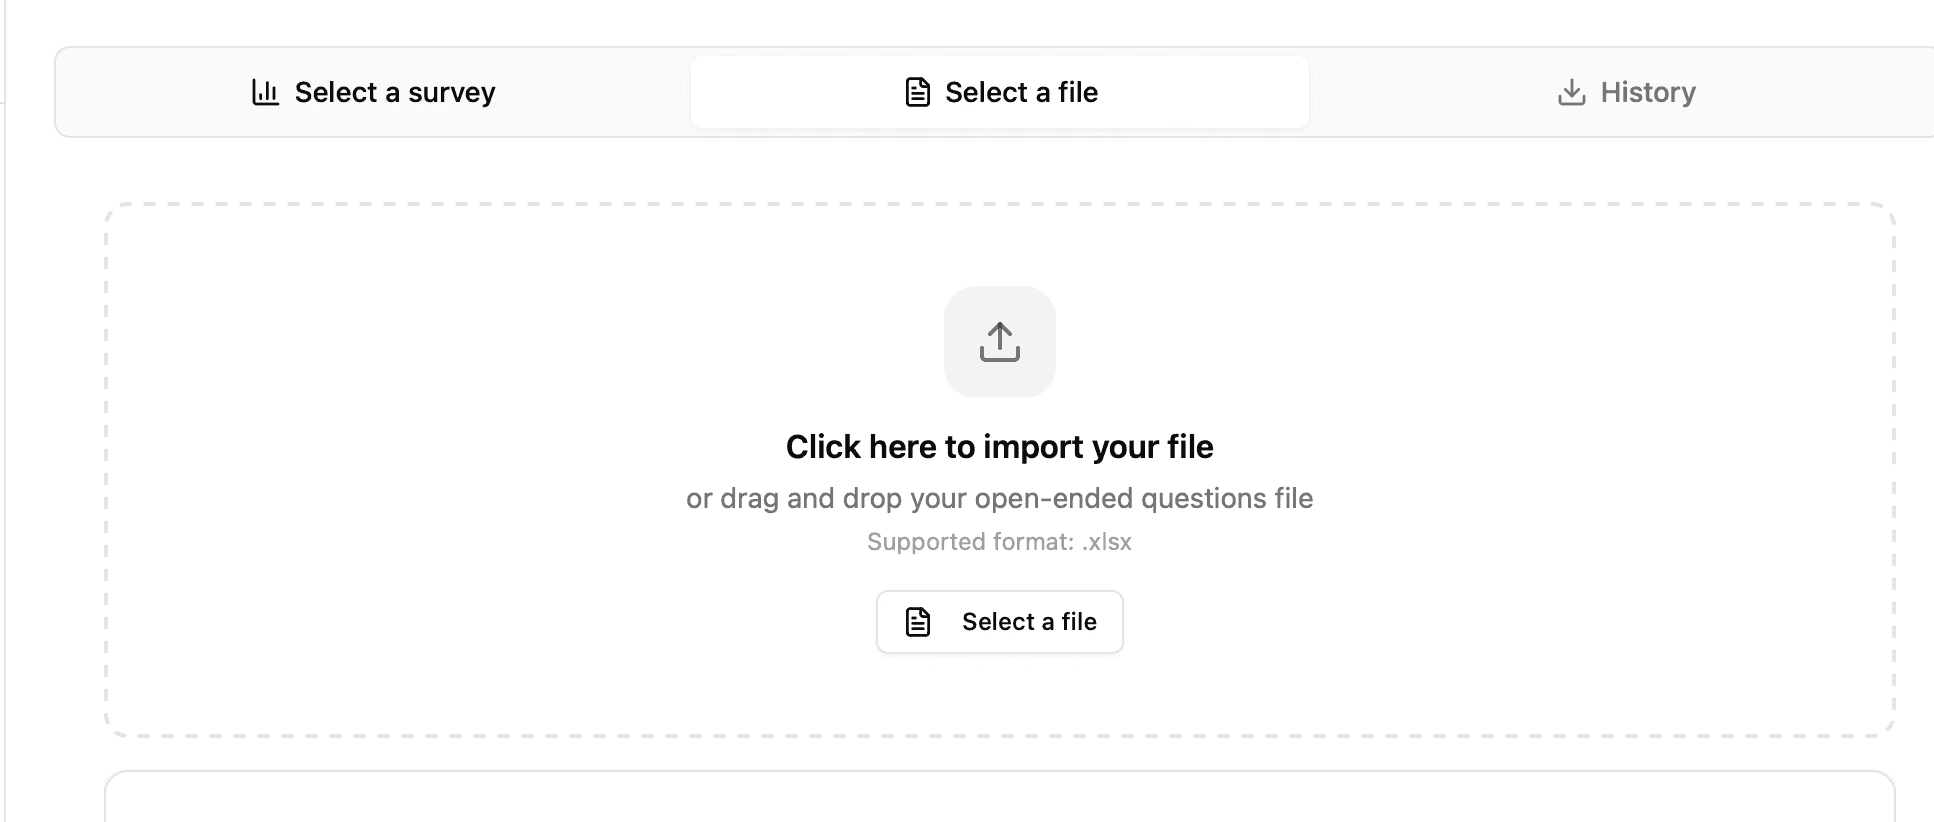
The codification accepts two sources:Excel file:
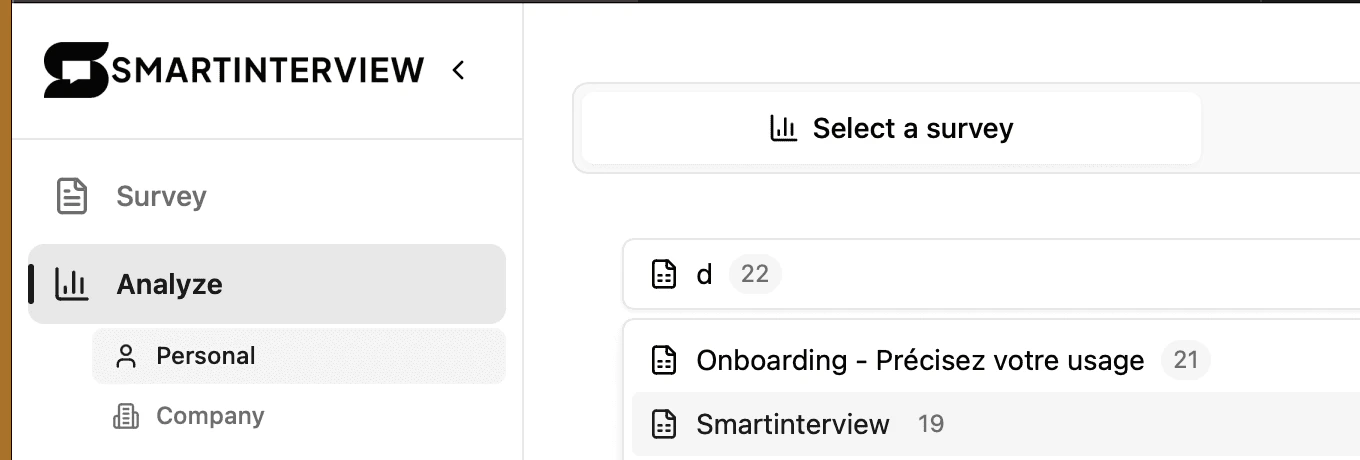
Survey:
File import: column selection
When importing a file, you must tell the system:- The respondent column (unique identifier for each respondent)
- If your file does not contain an identifier, choose “No column”: the system will automatically number the respondents from 1 to N
- The column of responses to be classified (the verbatim comments)
_Tip: The system automatically detects common columns (Respondent_ID, Serial, Responses, Answer, etc.) from the file headers._[Screenshot: selecting columns in the configuration]
2. Choose the classification depth
Depth 1 level (L1 only)
A flat list of main themes. Each answer is associated with one or more themes.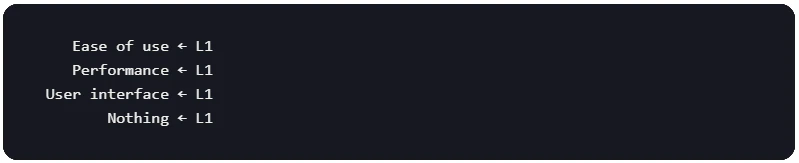
Use case: exploratory studies, initial rapid analysis, short verbatim transcripts.
Depth 2 levels (L1 + L2)
Main themes (L1) with attached sub-themes (L2). The structure is hierarchical: each sub-theme belongs to a single parent theme.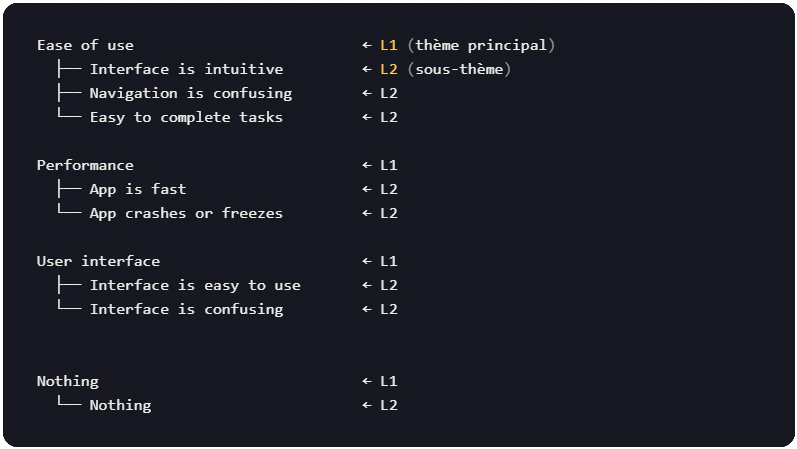
Use case: in-depth studies requiring fine granularity, distinction of nuances within the same theme, coding conforming to market research standards.In this example:
- Ease of use → L1 (main theme)
- Lines with an ID → L2 (sub-themes)
3. Define the coding plan
You also have two ways to create your code plan:- A - Import an Excel codeframe (as in the example)
- B - Let the AI generate the themes.
Option A: Importer les codes via Excel
If you already have a code-frame, import it directly.Format for 1 level
A file with at least one column containing the theme labels:Format for 2 levels
The file must be structured L1 and L2 hierarchically. The system automatically detects the ID and Label columns from the headers. Option 1: Separate level columns (in an Excel sheet):
Option 2: With identifiers and Parent_ID:
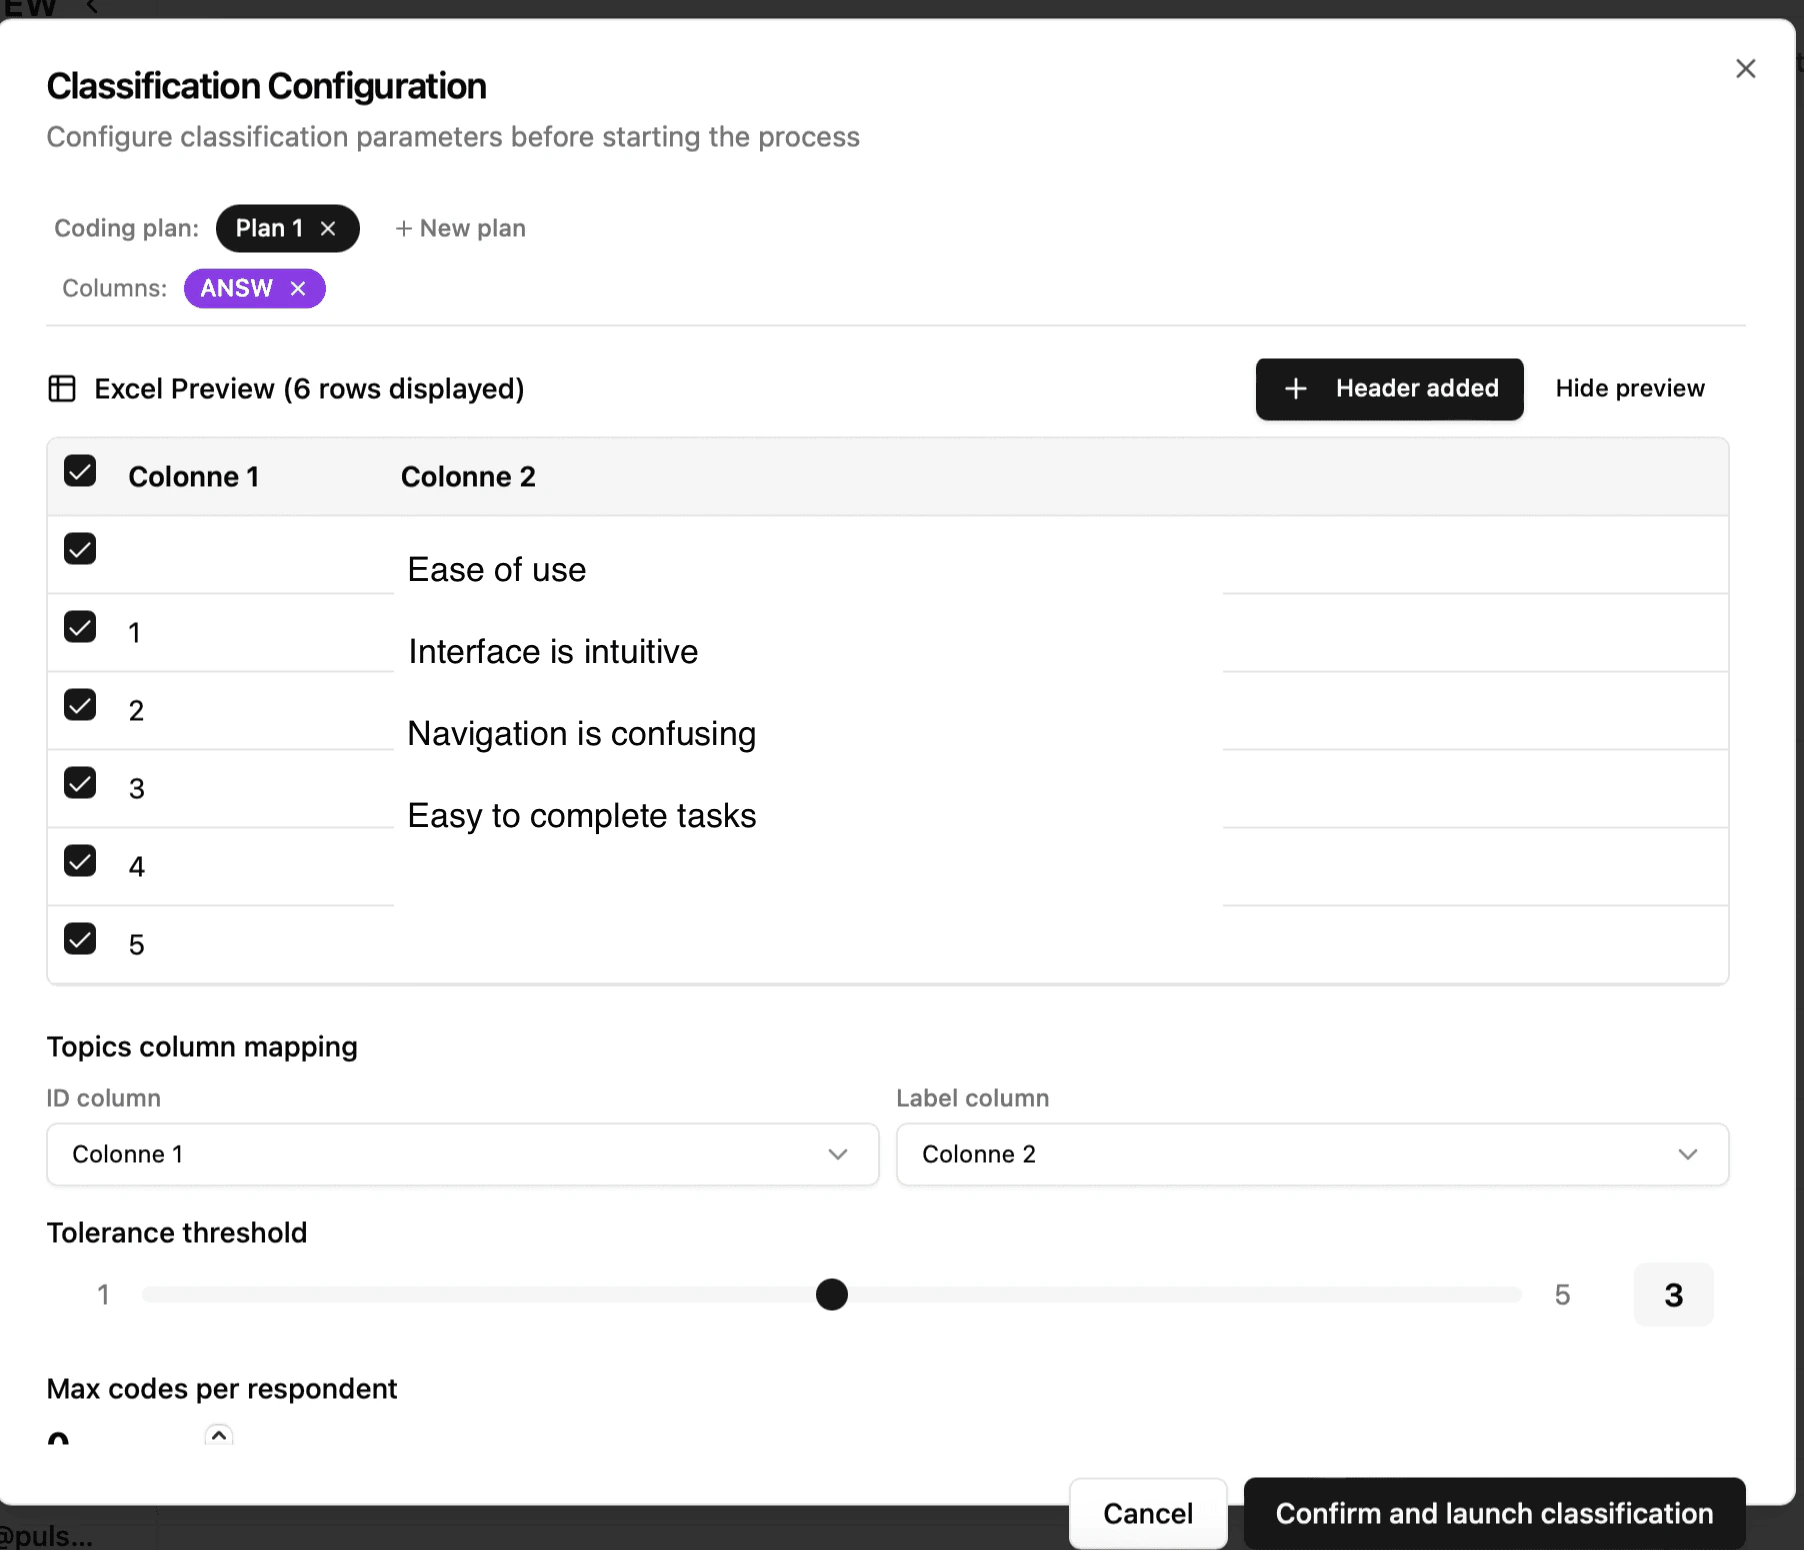
Tip: You must store the topics in a separate sheet of your Excel file (e.g., a “Topics” tab). The system will prompt you to select the sheet containing the codes.
Preview and filtering
After the import, a preview of the code frame is displayed with:- The number of topics detected (updated automatically)
- The ability to filter by column (useful for excluding certain categories)
- The ability to manually exclude individual rows
Option B: Generate the codes using AI
If you do not have a pre-existing code plan, the AI analyzes a sample of your responses and automatically discovers recurring themes.How it works
- The system samples up to 400 responses from your file.
- AI identifies recurring themes and formulates them into clear labels.
- The themes are sorted by estimated frequency (the indicative number of respondents concerned).
- The themes are automatically numbered (sequential IDs).
Provide personalized instructions (guidelines)
You can guide the generation by providing text instructions in the “Guidelines” field: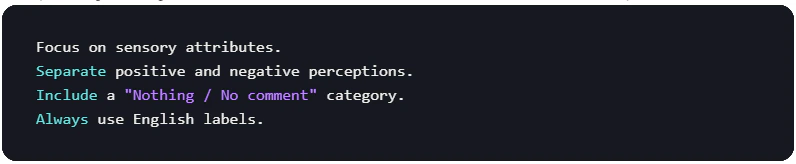
- The vocabulary used for the labels
- The level of granularity (more or fewer themes)
- The analytical perspective (sensory, emotional, functional, etc.)
- The language of the labels
Important: These instructions are in Beta. They work well for guiding the generation process, but results may vary. Always check the generated themes.
Generation in 2-level mode
In 2-level mode, the process involves two steps:- L1 generation: AI identifies the main themes
- Automatic L2 generation: For each L1 theme, AI automatically generates sub-themes based on the corresponding responses.
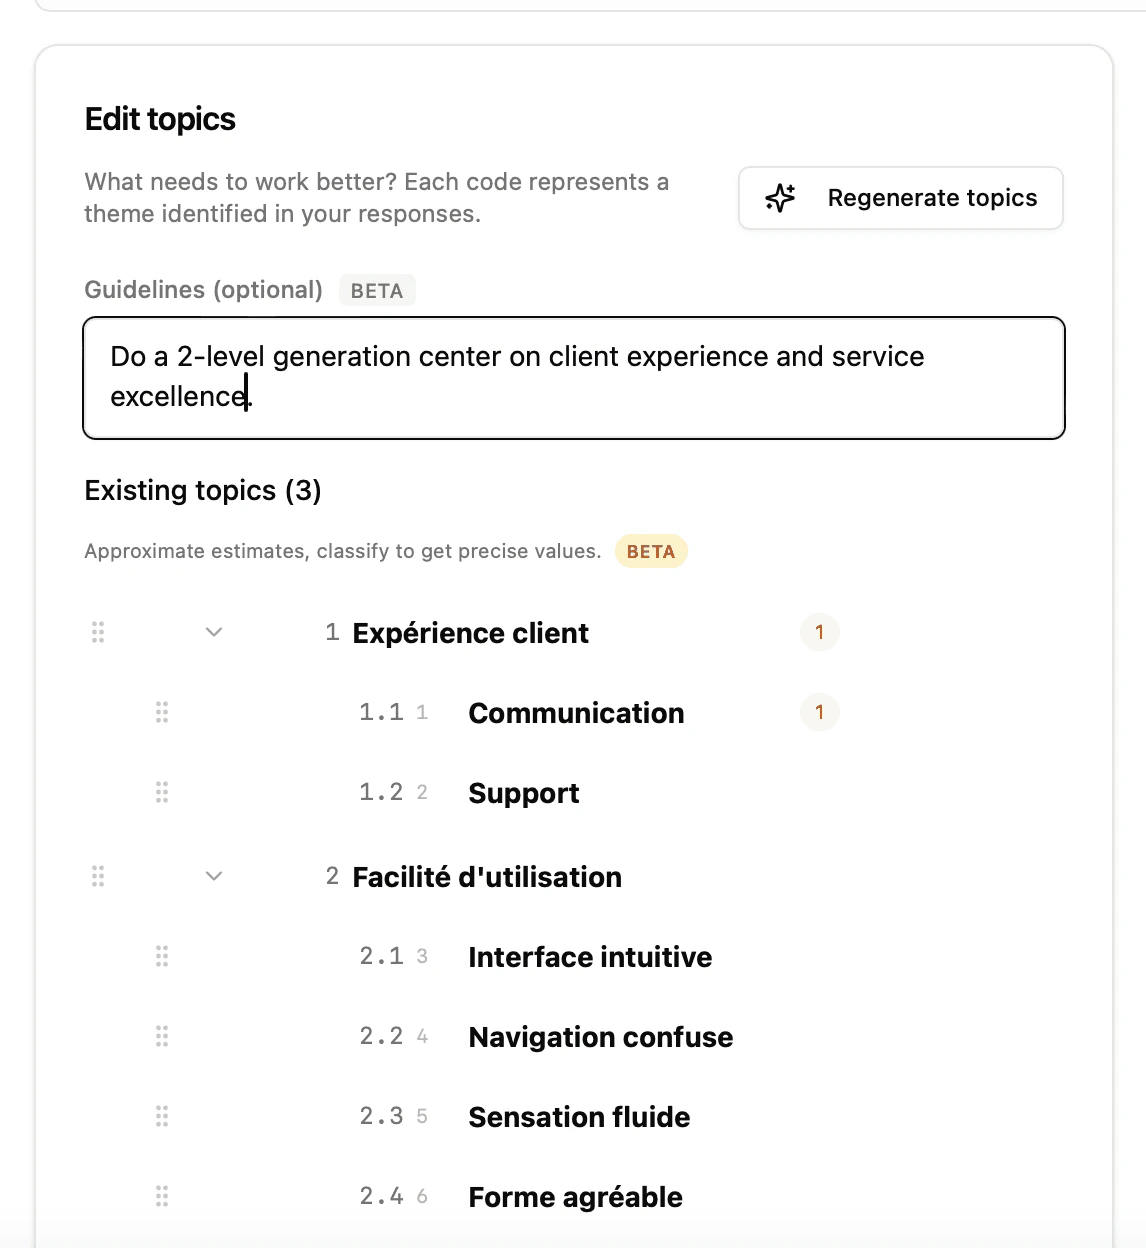
Theme editor
Whether imported or generated, themes appear in the theme editor (left sidebar), where you can:The estimated frequencies (indicative number displayed next to each theme) are recalculated after each classification. Before the first classification, they come from the AI’s estimate during generation.
4. Configure the classification rules
The rules control how many codes can be assigned to each respondent. They are applied at three levels: during pre-classification, on imported examples, and during full classification.Rules for level 1
Exemple*_ : With Max codes = 3, a respondent can only receive a maximum of 3 themes, even if their answer mentions more.*
Rules for 2 levels
In 2-level mode, three additional parameters allow for fine control:
Order of application of the rules:
- Max L1: Limits the number of main themes (Pass 1)
- Max L2/L1: Limits subtopics by parent (Pass 2, by calls)
- Max L2 global: Final ceiling after merging all sub-themes (post-processing)
Tip: The Max L2/L1 ratio is particularly useful when some L1 themes are very broad and might monopolize all the sub-themes. For example, with Max L2/L1 = 2, each parent theme can only contribute a maximum of 2 sub-themes, ensuring a balanced distribution.
5. Import a training set (past data) (optional)
Why import examples?
A training set (or a few-shot examples) allows us to show examples of already coded verbatim transcripts. These examples are sent as context to guide each batch of classification. Importing is recommended when:- The themes are nuanced or closely related.
- You want continuity within a project or between several projects.
- You have specific coding conventions (e.g., certain expressions must always be classified under a particular theme).
- You want to replicate an existing classification on new data.
- Pre-classification without examples yields unsatisfactory results.
Training file format
The Excel file should look like this:
The system automatically detects columns containing codes by comparing them to the themes defined in your coding plan. Columns whose values correspond to known themes are automatically identified.
Limit: 30 examples are kept. The codes must be the same as those used in the initial code plan of the newly imported files.
Verification and translation
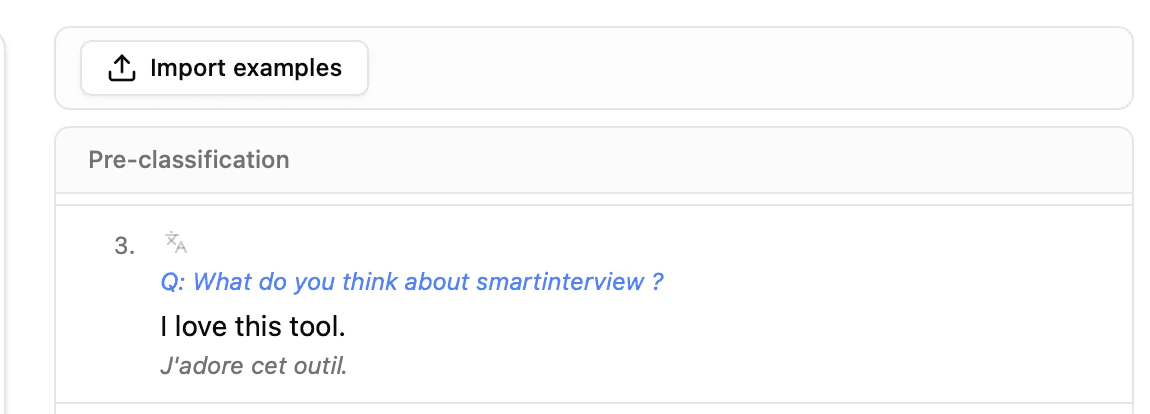
Each imported example is displayed with:- The text of the response (verbatim)
- The assigned theme badges (color-coded)
- An individual translation button with language selection (French, English, German)
6. Pre-classify a sample
What is pre-classification?
Before running the classification on the entire dataset, the system classifies the first 30 responses as a test. This is the most important step to validate the quality of your coding plan. The pre-classification uses the exact same algorithm as the full classification, but on a smaller sample to allow for quick verification.What the pre-classification shows you
For each answer, you see:- The verbatim text (with keywords corresponding to the themes highlighted)
- The assigned L1 badges (with color coding)
- The assigned L2 badges (if depth = 2), grouped under their L1 parent badges
- A summary: number of classified responses out of the total
Correct the results
The pre-classification is interactive; you can correct each line:Validation area: All lines between your first and last correction are considered validated. They are highlighted in blue and automatically become valid for the complete classification.
7. Launch the full classification
When to start the classification?
Start the full classification when:- The pre-classification themes match your expectations.
- Any necessary corrections are made to the first 30 lines.
- Training data is imported.
- The rules (Max codes) are correctly configured.
What’s happening in the background
- The responses are divided into batches.
- Each batch is sent to the AI with:
- List of available themes
- Training examples (imported + pre-classification corrections)
- Configured boundary rules
- In 2-level mode:
- Pass 1: L1 classification on all batches
- Pass 2: For each assigned L1 theme, L2 classification by parent
- Post-processing: Application of the global L2 ceiling (Max L2)
Result
After classification, you see:- A success banner: “Classification complete: N classified responses.”
- The first 30 responses with their assigned codes (editable)
- The imported examples (expandable section, if a training set was used)
- The correlation matrix (see next section)
8. Evaluate the results using the correlation matrix
The MECE principle
A quality coding plan must be MECE:
- Mutually Exclusive: Each theme covers a distinct aspect. Two themes should not describe the same thing.
- Collectively Exhaustive: The set of themes covers all responses. No verbatim response should remain without relevant code.
Read the co-occurrence matrix
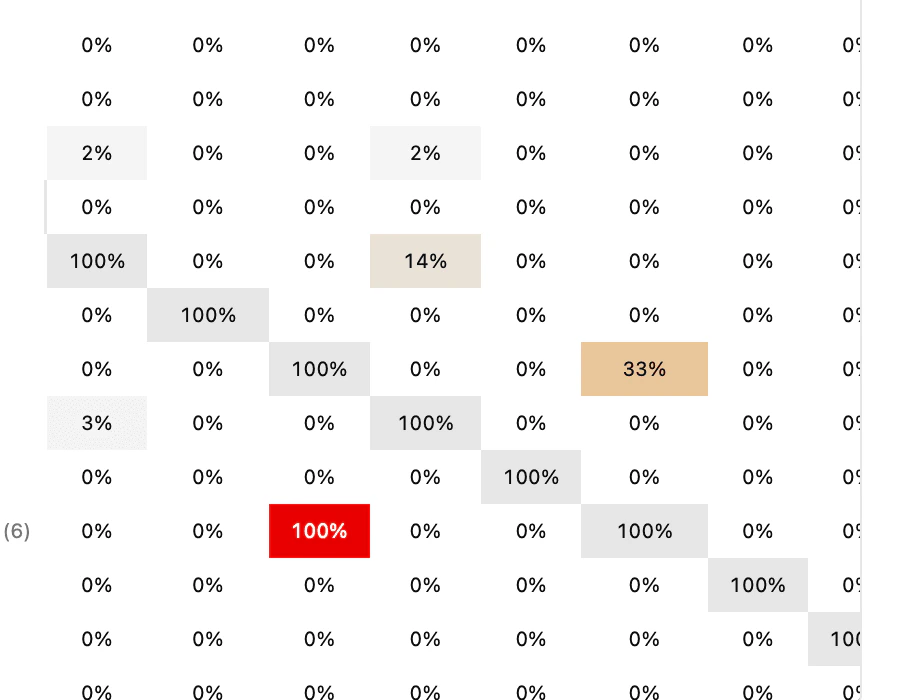
The matrix displays the percentage of respondents who received two themes simultaneously. The diagonal is always 100% (a theme is always correlated with itself).How to interpret the matrix
Highly correlated cells are highlighted in color to quickly identify problems. Exemple d’analyseIn the matrix above:
- App is fast × Interface is intuitive = 33% → These two sensations are sometimes mentioned together. This is normal for a product consumed by inhalation: the themes remain distinct.
- Nothing × everything else = 0% → Perfect: respondents who have nothing to say are not categorized under other themes.
- Interface is intuitive (122) is the dominant theme: 122 out of 232 respondents, or more than half.
Acting on the results
If the matrix reveals problems:- Click “Back to codes” to return to the theme editor.
- Merge redundant themes or rewrite ambiguous definitions.
- Rerun the classification; the corrections made to the first 30 lines are saved as training examples (“Re-classify with corrections” button).